How to Disable a Key on Keyboard in Windows 10
Windows allows you to change the repeat speed for your computer, but there is no option to disable a key on a keyboard in Windows 10 operating systems. This tutorial is for those who want to correct the keys or prank with their friends. You can easily disable the Windows, Shift, Ctrl, Delete as like as any key functionality from your keyboard to make prank with your buddies.
This tutorial is based on the most recent Windows 10 operating system, but you could use it in Windows 8, 7, XP as well. Follow the tutorial to disable a key on any keyboard.
How to Disable Keys on Keyboard in Windows 10
There is a tiny program named Simple Disable Key allows you to disable keys on your computer keyboard. Before going ahead, download Simple Disable Key and install it on your computer.
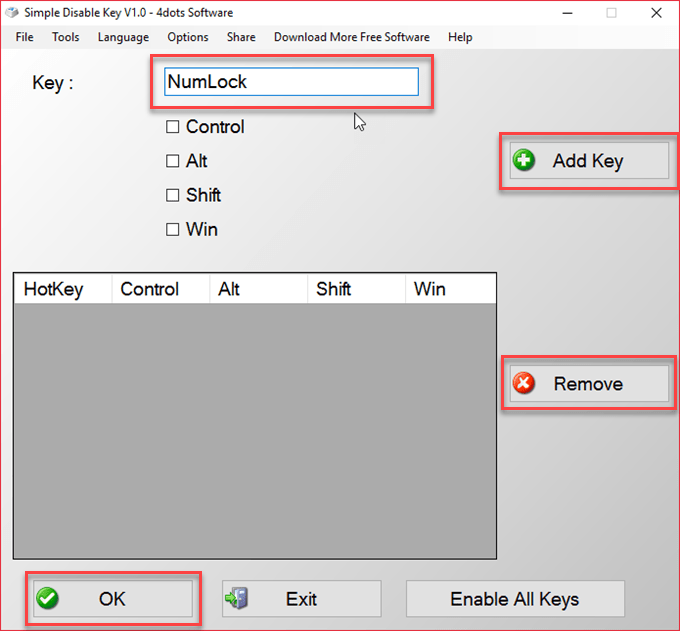
1) This software comes with a simple interface, and working procedure is also easy. In order to disable a key, just run the application and click on the text bar.
2) After that, you need to press the key which you want to disable. It’ll show the key name on the text bar which you have pressed.

3) Now, click on the “Add Key” button and select from the given three options; Always, Program and Schedule. Always option disables a key permanently. Program option is useful to turn off a key on a particular program and you can schedule the time limit with Schedule option.

4) Select “Always” option and click on the OK button. After that click on the OK button on the main screen and you are done!
In order to enable a previously disabled key you will have to choose the key row on the grid and press the “Remove” button on the right. Afterward, press the “OK” button on the main screen.
- How to Install Custom Themes and Visual Styles in Windows 10
- How to Delete Temporary Files in Windows 10 Manually
- How to Enable and Disable Hibernate in Windows 10
This software is quite useful, if you want to play with your keyboard. This was the tutorial on how to disable keys on keyboard in Windows 10. If you want to change the action of a key, then follow the below tutorial.
How to Change a Key Action in Your Keyboard?
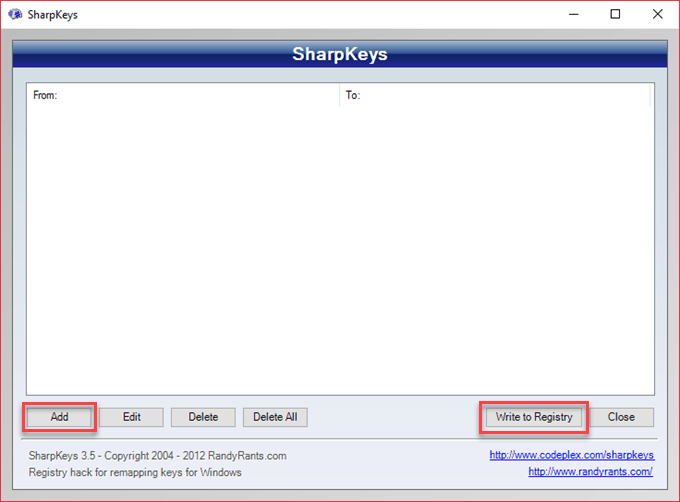
SharpKeys is a tiny program which does a fantastic job in remapping the keys. You can disable any unnecessary key or you can transform any key into any other key. The bottom line is that you can customize almost all keys in your keyboard according to your need.

The working procedure is same as the previous software. You just need to select a key from the left side, and then choose the function which you want to change from the right side. After adding all of the keys which you want to change, click on “Write to Registry” button, and you are ready to go. That’s it.
By using these two programs, you can easily disable or change a key action on keyboard in Windows 10. If you like this post, then don’t forget to share with your friends.