How to Convert Slow Motion Video to Normal Video on iPhone or iPad
A slow motion video usually records more frames per seconds to show you that normal video slowly. More frames mean more memory and that takes much space than a normal video. If you shoot more videos in higher frames, then your device may run out of storage sooner or later. An iPhone or iPad comes with limited space. In case you are running out of space and also don’t want to delete your favorite videos, then I have a solution for you.
Convert Slow Motion Video to Regular Speed in iPhone or iPad
If there is no space left on your iPhone, then you can transfer your data to your computer or can quickly save some space by converting slow motion videos to normal videos. This process will reduce the frame speed as well as the size of that file. This procedure is applicable for both iOS 9 and iOS 10 devices.
- How to Freeze any iPhone or iPad with a Blank Text
- How to Install Third Party Apps on iPhone without Jailbreak
- How to Remove System Apps in iOS 10 on your iPhone or iPad
Once you have modified the video, if you share the newly normal speed video with your friends it can not be made into a slow motion video again until the original file is modified. There are many other apps available on the App Store to do the same job, but your native Photos app can make it in a better way than others. So, let’s get started.
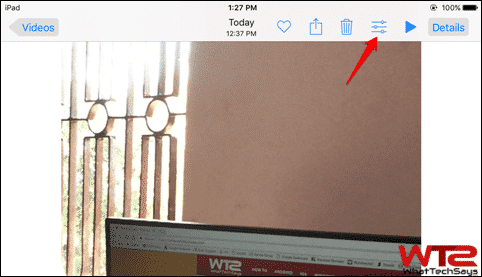
1) Open Photos app from your iPhone or iPad and locate a slow motion video which you want to convert to normal speed.
2) Now tap on the “Edit” icon.

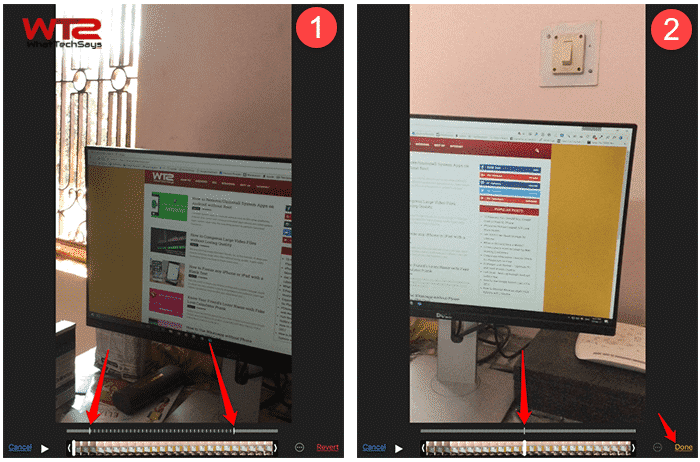
3) You’ll now see a timeline with two sliders below the video. The middle portion of these two sliders is the slow motion video. You just need to shrink the slow motion part of the timeline until they join into one.

4) After making these two sliders into one, tap on the “Done” button located at the bottom-right side of the screen.
That’s it. This was the simple tutorial on how to convert slow motion video to normal video on iPhone or iPad. I have tested this on my iPad having iOS 10.2.1, and it is working fine.
If you have iMovide installed on your phone, then you can also use it to change the frame speed of your video, but using the built-in Photos app is far the easiest way, and it needs no extra applications or downloads.