Setup Custom Domain Name on Blogger with Bigrock
It is difficult for a newbie to explore all these procedures to setup a domain name for his/her or her blog. By following these below pictures you can easily setup a Bigrock domain name with your Blogger blog.
Add Custom Domain Name on Blogger
Before going to domain setup, first learn how to create a free blog on Blogspot?
1) Login into your blogger account with your Gmail Id and Password and click on your blog name, which you had created before. Now click on Settings menu.
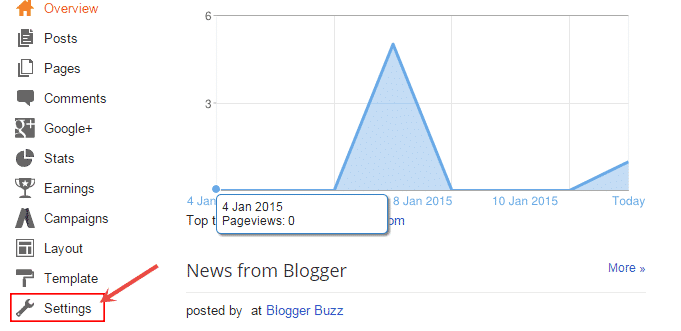
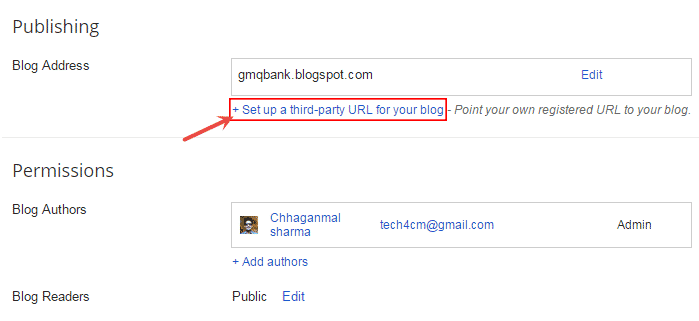
2) In Basic setting menu, look up for Publishing section and click on + Set up a third-party URL for your blog.
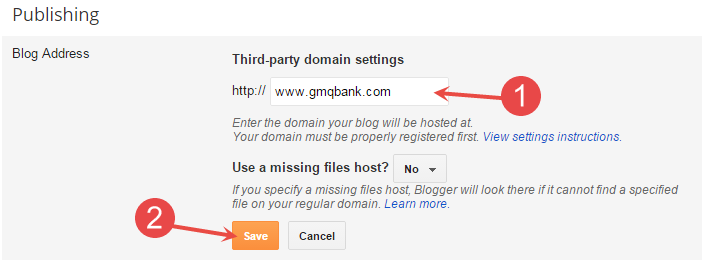
3) Now to put your domain name on the box, which you have bought from Bigrock and click on Save button. (In my case, the domain is www.gmqbank.com)
4) After clicking on Save button, you’ll see an error message like, “We have not been able to verify your authority to this domain. Error 12.”. This happens due to, you have not verified your ownership with this domain name. To verify your ownership, copy these two CNAME records to add to Bigrock’s CNAME records.

Setting up DNS on Bigrock
1) Login into your Bigrock domain panel and click on your domain which you added earlier on Blogger dashboard.

2) Now point to DNS management section and click on Manage DNS.

3) In DNS management panel, click on CNAME Records and then click on Add CNAME Records to add your two CNAME records. See the below picture for better understand.
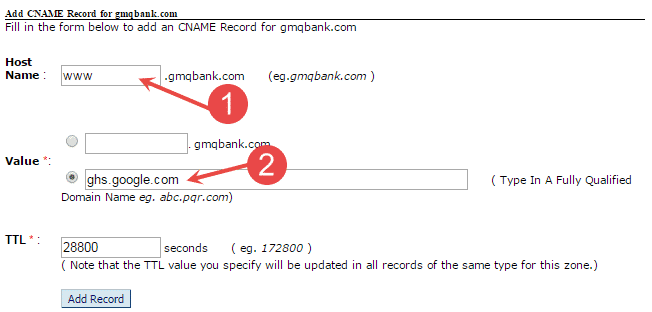
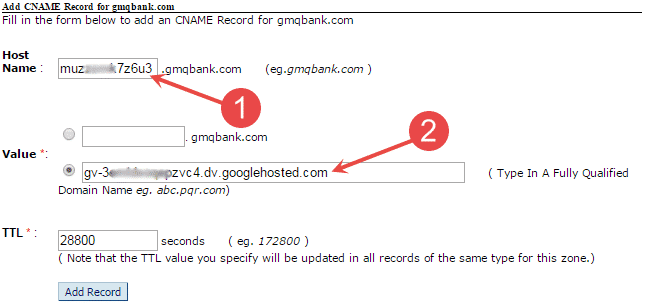
4) After completion, add four A Records on A Records section.
216.239.32.21
216.239.34.21
216.239.36.21
216.239.38.21
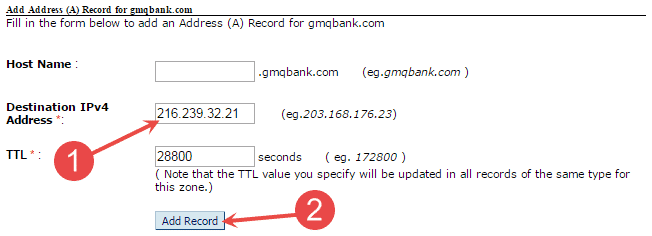
5) Wait for few hours and you are ready to start your Blog.
Final Setting
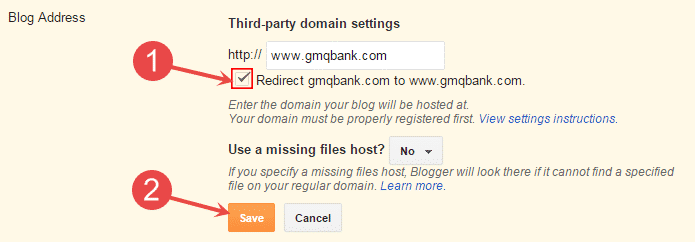
Now just one thing to do. Go to your Blogger Dashboard and navigate to Basic>>Publishing>>Edit and tick the check box to Redirect yourblog.com to www.yourblog.com and then click on Save button.