How to Edit Hosts File in Windows 10
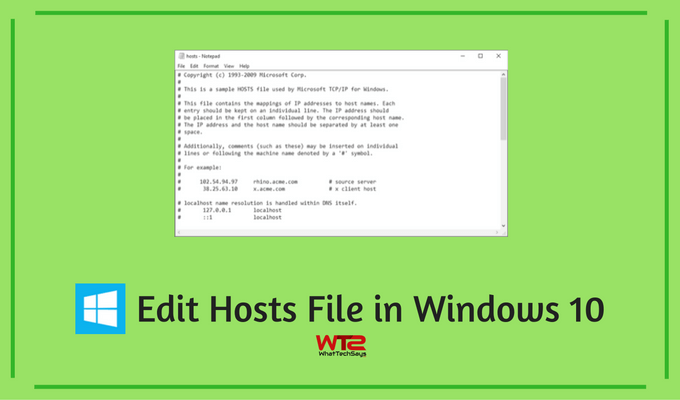
The file consists of IP addresses separated by at least one space and then a domain name with each entry on its line. To modify the hosts file, you need to add two entries to the file that consists of the IP address that you want the site to handle to and the address. Like,
54.43.209.186 www.domain.com
54.43.209.186 domain.com
On every Windows Operating System, the hosts file is located on the below location. Where “X” is the is the drive where the Windows OS has been installed.
X:\Windows\System32\Drivers\etc
What Can You do with the Hosts File?
There are many things you can do with the Hosts file, such as it allows you to
- Assign Local Domain Name
- Redirect Websites
- Blocking Websites
- Create Website Shortcuts
How to Edit Hosts file in Windows 10?
One can easily modify the Hosts file in early Windows operating systems by the ‘edit’ command in command prompt. You just need to open the command prompt windows with “Administrator” privilege and go to the location of the Hosts file and edit it by using ‘edit’ command. But, this procedure doesn’t work on Windows 8.1 and 10. The reason behind the problem is, the ‘edit’ command is not a part of Windows 8.1/10. When you type edit on these operating systems, it shows
‘edit’ is not recognized as an internal or external command, operable program or batch file.
The ‘edit’ command works on the 32-bit Windows OS, but it is not possible to run in a 64-bit OS. Because, the edit command requires 16-bit QBASIC.EXE, that’s why it will not work. But don’t worry, I have two working methods to edit Hosts file in Windows 10 or Windows 8.1 successfully.
- How to Disable a Key on Keyboard in Windows 10
- How to Install Custom Themes in Windows 10
- How to use Multiple Virtual Desktops in Windows 10
Note: Before going to the procedure, make sure that you are the administrator of your that system you want to modify the hosts file. For security reason, some Antivirus programs including Windows Defender doesn’t allow you to modify hosts file in Windows 10. So, before attempting the modification, don’t forget to disable the Antivirus temporarily.
1# Edit Host File in Windows 10 with CMD
CMD or command prompt is still the best choice to modify hosts file in Windows operating system. But, instead of using the ‘edit’ command, you have to use the built-in Notepad program for this purpose. Let’s do it.
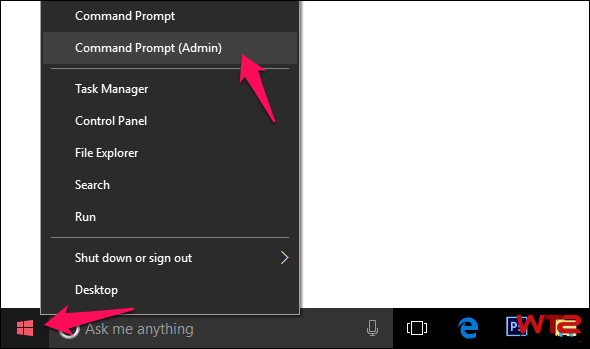
1) On the Windows 10 computer, right-click on the Start Menu and select “Command Prompt (Admin)”.

2) After that, in the command prompt window type the below commands one after another to go to the Hosts file directory and open the hosts file in the Notepad program. Follow the screenshot for better understanding.

[su_note note_color=”#fffbdb” text_color=”#000000″]cd drivers\etc
notepad hosts[/su_note]
It will open the Hosts file in Notepad program with Administrator access. After the modification, you can press Ctrl+S or click Save from File menu. Now you are done! To block a website, put a wrong IP address of that website and the website name right after the IP like the above example.
2# Edit Hosts File without Admin Rights and CMD in Windows 10
If you are not good in using CMD and don’t know the proper way to allow admin access to command prompt, then this is the easy process for you to edit hosts file in Windows 10 or Windows 8.1.
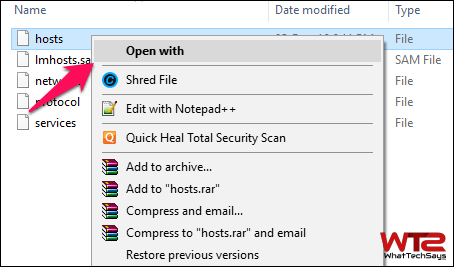
1) On your computer, go to the Hosts file location, C:\Windows\System32\Drivers\etc and right-click on it and open with notepad.

2) Modify the hosts file as your requirements and after that press Ctrl+S or click Save from File menu to apply the changes.
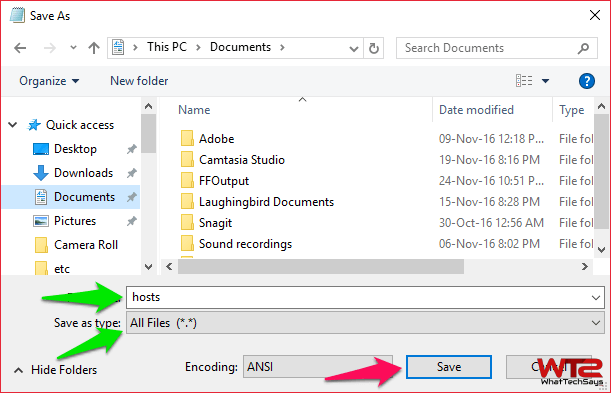
3) Unfortunately, you can’t save this file now. Because you don’t have rights to overwrite the system file. So, you have to save that file to a different location; like your desktop or any drive. Make sure that you are saving it as “hosts” and selecting the file type as “All Files” as shown below screenshot to save it without any extension. In my case, I have saved it in the Documents folder.

4) Now simply copy or cut the modified Hosts file (from the Documents folder) and paste it into the right location, C:\Windows\System32\Drivers\etc.
5) Since there is already a file with the same name, you have to replace that existing file with the modified one. That’s it.
These are the two simple and 100% working ways on how to edit hosts file in Windows 10 or 8.1. I hope this guide will be helpful in the modifying hosts file in latest Windows operating system. If you have any doubts regarding the tutorial, feel free to mention in below comments.